Yeesh! Could that Title have any more adjectives?
I'm convinced the more words you can use to describe something, the fancier it sounds.
Which therefore makes it sound highfalootin'.
These cookies aren't highfalootin'.
Delicious but simple. This cookie is a modified derivative of Nestlé's Classic Chocolate Chip Cookie.
Made by a young, married, Pastry Chef who loves to garden and Gig'em. See?? Fancy. :)
We start this recipe by browning 2 sticks of unsalted butter.

The butter will start by melting and getting foamy, then you will decide to switch your butter to a cuter pan, because using your college "ramen" pan is just no good. Oh an because you are ridiculous.

Is this not the most adorable teeny tiny butter-meltin' pan you've ever seen?! I sure hope so because it was an enormous pain in the .... well you know. I recommend using a normal sized pan, as a posed to my Barbie playhouse version.

Bubble Bubble toil and trouble.
I would recommend when you are new to browning butter you do it slowly over a lower heat until you get to recognize the stages leading up to the perfect "brown".

While your butter is going start measuring out your other ingredients.
For this recipe I used a 3/4 cup of granulated sugar and 3/4 cup brown sugar.
If you like your cookies on the crispy end of the spectrum this is a good ratio for you. ( My Pop would love this recipe.)
If you like your cookies a little softer I would up the ratio of brown sugar. Maybe try a cup of brown to a half cup of white.

A tip I would give y'all to measuring out the brown sugar would be to move your sugar to a zip lock bag if it doesn't already come in one. Then stick your measuring cup in the bag and pack by scooping a heaping cup, and using your hand outside of the bag press it down into the cup. Don't be afraid to use a little muscle here, remember you have to burn off some calories so you can eat ALL the cookies you want. Trust me on this... you'll want to eat them all.

Place your sugars into your mixing bowl and mix to combine.

Meanwhile measure out 2 1/4 cups of AP flour.

A tsp of salt.

I like using the bigger sea salt flakes for this because it gives you more of a salty burst when you go to eat the cookie. As much as I like chocolate, I can't seem to eat it alone any more, now that my eyes have been opened, salt and chocolate are like biscuits and gravy to me. Can't have one with out the other. Hmmm biscuits and gravy... I may have found my next blog post topic!

Add to your dry ingredients 1 tsp of baking soda.

Here's a secret: 1 tsp of cornstarch! This will activate while baking and it will help to create a taller prettier cookie.

Whisk all your dry ingredients together to combine evenly.

Done! Shaboom!

By now hopefully your butter will be lovely and brown. It will have dark flecks, and smell incredibly fabulous.

I poured my butter out into a large shallow cake pan to cool it off faster. We want the butter nice and cold.

There WILL be yummies left in your pan.
SCRAPE. THEM. OUT.
Get as much of that gold out of there as you can, You've already worked so hard for it, plus it'll taste that much better in your cookie.

Now set your cake pan in the freezer just to let it cool down all the way.

When you pull it out it should look like this.

Scrape this into your mixing bowl with your sugars.

I don't know if this is because I am a baker, a southerner or just me but butter never ceases to amaze me.

Once your butter is in with your sugars, whip it up together.

Like zees.

Now add in 2 eggs, one at a time, mixing after each addition.

Toss in a tsp of good vanilla extract.

And my trademark dollop of Vanilla Bean Paste. I swear I should be a sponsor for Nielsen-Massey. I go through about a bottle every two weeks.

Now whip it all up and scrape down your bowl.

Add in your dry ingredients and mix to combine.

Take more pictures...

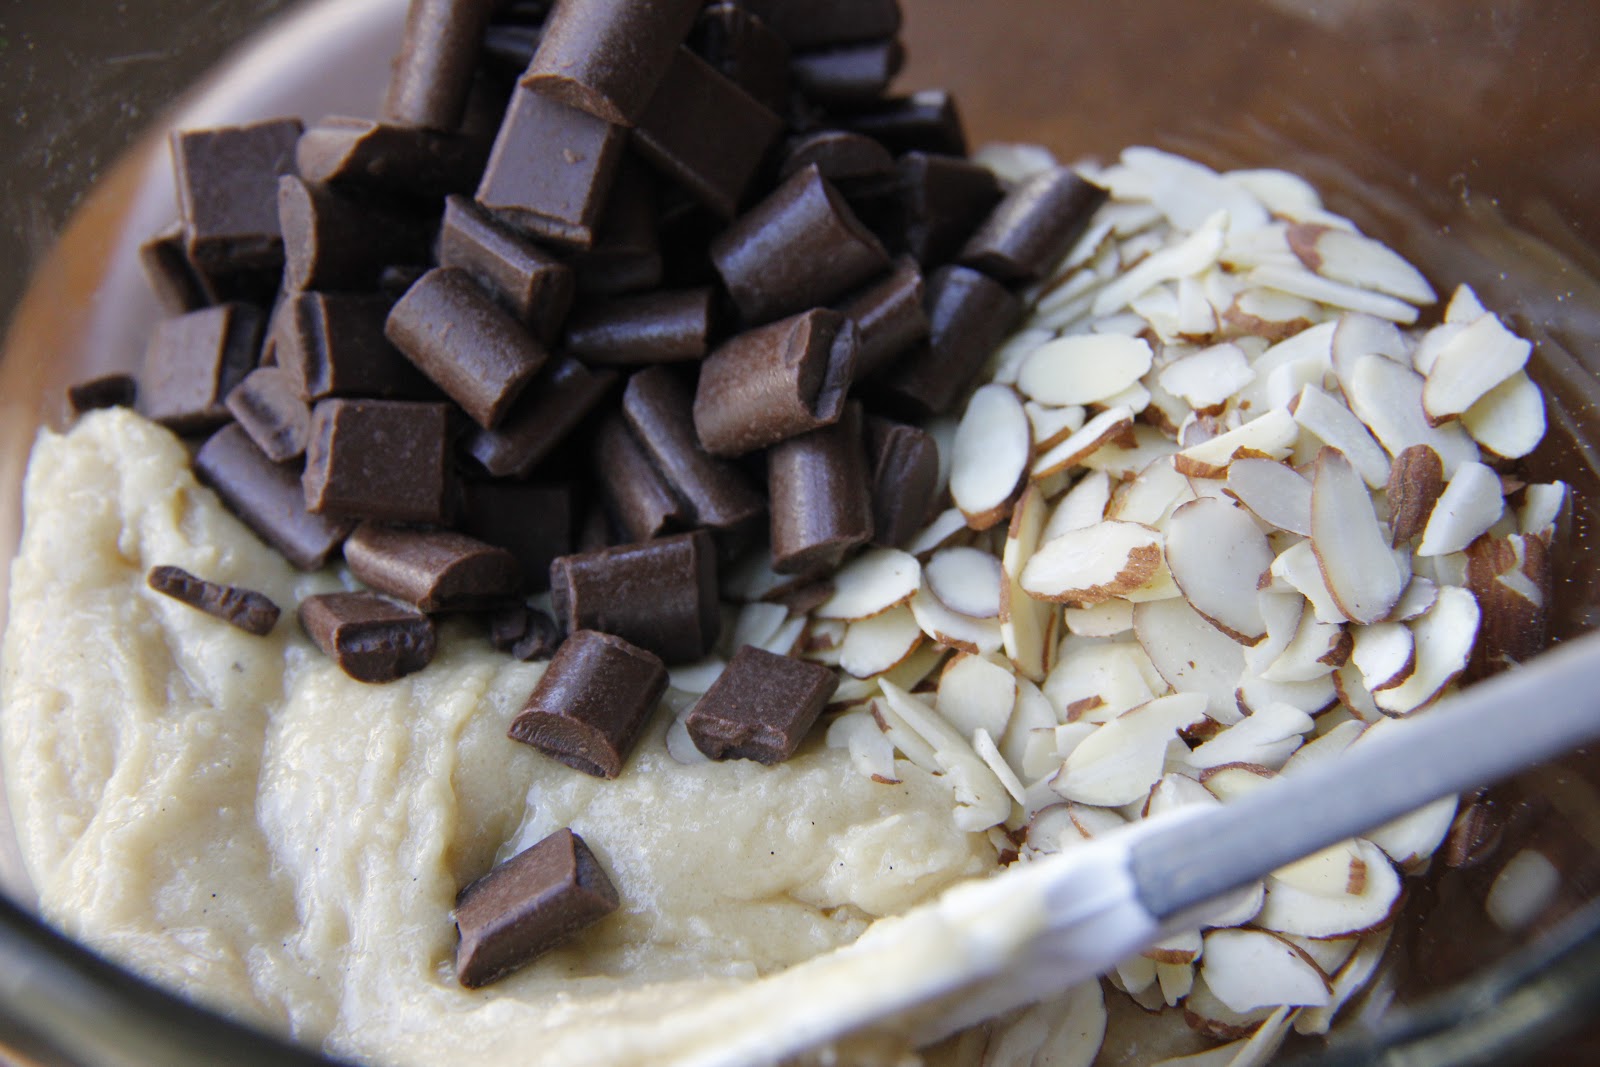
Re-focus, now add in your 2 cups of semisweet chocolate chips.

Mix!
Now grab your favorite sized ice cream scoop. Evenly scoop out all of your dough, out onto a sheet tray and place in the freezer. Yep you heard me.

Evenly scoop.

Place on a sheet tray, and freeze!
Once solid, you can either throw all of these in a zip top bag and save for a rainy day to pull out one at a time, OR bake them all off now. It's totally up to you.

We freeze these cookies to really solidify the butter. This will lead to a taller, fluffier cookie.
None of this flat cookie nonsense up in here.

Have you ever baked cookies using melted butter and you get a weird flat cookie pancake with chocolate chip islands? Freezing or chilling will prevent this tragedy from ever happening again.

Once you are ready to bake off and enjoy these babies, evenly space them about an inch and a half apart on a sheet pan.

Now here comes the fun part!
SALT!
I am using Maldon Sea Salt Flakes. These come in this super cool pyramid formations. You can play around and experiment with which type of salt you would prefer. Himilayan Pink, Dead Sea Black, Smoked Sea Salt, the possibilities are endless!
I just wouldn't recommend using table salt, you run the risk of using too much because the crystals are so small, and you might turn your sweet cookie into a salty puck. Plus these large flakes give bursts of salty to balance out the chocolaty-vanilla-y sweetness.

First you take your cookie.
(said in a Bill Cosby voice)

And then you add the salt, just a small pinch on top.

Then BAKE!
375 degrees, until done.
Yep, done.
If you bake small cookies it takes less time, if you bake a cookie cake more time.
You be the judge.
Plus some people like their cookies a little under done and gooey in the middle.
*cough-myhusband-cough*
So look for an even golden brown color, the cookie will appear to puff up at first in the oven then "settle", soon after the "settle" they should be done.
You'll smell it.
Trust me.

Hello Gorgeous!

Next is the hard part, trying not to eat them all!
Bring at least one to a co-worker, a best friend or a lover. That way you have proof, that you did indeed make the most epic chocolate chip cookies
EVER!

PS- Sorry about using the word lover... it made my skin crawl too. Next time I'll say spouse ;)
Love,
Lauren